
Mealworm farming is not going to bring you millions, but it is a profitable venture that has gained popularity among individuals who are looking for additional or alternative income streams. Any business venture requires capital, so let’s look at the costs associated with mealworm farming and the potential profits.
You can start a mealworm farm for $100 or less. It is low maintenance and even beginners can earn $800-$1000 a month.
Of course there is more to mealworm farming than that. But I wanted to point it out so you know it’s not expensive.
Cost of Mealworm Farm Supplies
To kickstart your mealworm farming venture, you will need some essential supplies.
Cart. A 3-drawer cart will serve as an ideal housing unit for your mealworms. I recommend LNK as it offers ample space for your mealworms to breed and grow.
Bedding. Next, you will need wheat bran, a nutrient-rich substrate on which your mealworms will thrive. You can find a lot of these online but I prefer LNK because it very suitable for mealworms.
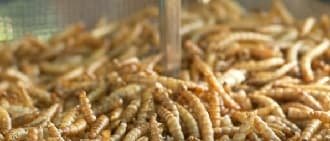
1000 mealworms. You can buy mealworm packs in various sizes, but 1000 is enough to get you started. It is just the right number to give you an idea of how to grow a mealworm farm without being overwhelmed. I pick LNK
Moth traps. Moth traps are another essential to protect your mealworm colony from infestation. These traps cost around $8 and well worth it. You’ll need these to keep moths and other pests at bay.
Packaging. A pack of plastic cups typically costs around $10-$12. You can get them in all kinds of sizes, but I like plastic because it fits well with mealworms.
Mealworm Starter Kit. These kits cost anywhere from $15-$40. Some kits include the mealworms, bedding and food. Others just have the mealworms.
You can opt for an inclusive kit or just the basic one. It depends on what supplies you already have. Again I don’t recommend splurging since you are just starting.
How Much Can You Earn Farming Mealworms?
Ok so we have covered the costs. Now the question is how much can you possibly earn?
Profitability depends on several factors, such as the size of your operation, local market conditions, and distribution channels. For this example we’ll take a look at how much a beginner can make.
Assuming you maintain a small-scale mealworm farm with a continuous production cycle, you can expect to harvest around 10,000 mealworms per month.
Let us take a conservative approach. If the average price of each mealworm is $0.10, you would earn about $1000 in monthly revenue.
After deducting the costs of supplies, maintenance and your initial investment, you can get a monthly profit of $850 or more.
So if you start with 1000 mealworms the revenue will be around $100. Of course if the average price is higher than $0.10 you will earn more.
How to Maximize Profits
As a beginner you should focus first on growing and caring for the mealworms. I wouldn’t worry too much about profits.
But once your farm starts taking off it’s time to look for ways to boost income. First thing you should do is care for and maintain the farm. We will look at that in a bit but it doesn’t take a lot of effort.
You can also look at other ways to increase revenue. Buying more mealworms is the first step obviously. If you started at 1000 mealworms, you can go up to 2000 or 5000 depending on your budget.
I also suggest breeding and selling adult beetles or selling mealworm supplies. You can set up a local store (if there is demand in your area), go online or both.
Your goal should be to expand your customer base and gain new ones. As your business grows, be prepared to keep updated on market demands and maintain a high-quality product.
Mealworm Farm Maintenance Cost
One of the best things about mealworm farming is it is low maintenance. Once everything has been set up, you just need to perform a few tasks.
Mealworm maintenance can be divided into the following:
- Food
- Harvesting and life cycle
- Grain mite prevention
Food for Mealworms
The stuff you use to line the container also serves as their food. There are many options:
- Wheat bran
- Oatmeal
- Grain cereal
- Cat food
- Dog food
If you are going to use cat or dog food, grind them first so the worms can eat them.
Add 1.5 inches to the container. You will need to add to these regularly as the worms will eat them.
You can also add bits of fruits or vegetables, but remove those that mold, rot or dry out. Replace the bedding every few weeks. If mold grows in the bedding or starts to smell, replace it immediately.
That is really all there is to feeding mealworms. You don’t need to spend anything actually except for the bedding. Those leftover fruits, vegetables and pet food are enough for them.
The Mealworm Life Cycle
To maintain a mealworm farm you have to be familiar with their life cycle.
Mealworms go through a complete metamorphosis. We can divide into the following.
Stage 1 Egg: The life cycle begins with tiny, whitish eggs that take about one to two weeks to hatch.
Stage 2 Larva: The hatched larvae are the mealworms. They are pale white and up to 1/4 inch in length. They grow continuously by shedding their exoskeletons or molting.
Stage 3 Pupa: When mealworms complete their larval development, they enter the pupal stage. Pupae are non-motile and usually appear cream-colored. This phase lasts around one to two weeks.
Stage 4 Beetle: The final stage sees adult beetles emerge from the pupa. Beetles are dark brown and around 3/4 inch long. They lay eggs, completing the life cycle.
When to Harvest Mealworms
Mealworms are usually harvested at 3-4 months. Wait until the worms grow, but don’t wait too long or they will turn into beetles
Knowing when to harvest mealworms is crucial for obtaining optimal yields. Here are some key factors to consider:
Size: Mealworms are typically harvested at their largest larval stage (full-grown). You can tell because the worms have a hard exoskeleton and are plump.
Color: Mature mealworms develop a golden-brown hue, contrasting the original pale white color of the larvae.
Pupation: If your intention is to collect pupae for breeding or as a separate product, you should harvest the larvae just before they enter the pupal stage.
To harvest mealworms properly, gently sift them from the substrate using your hands or a sieve. Place them in a container with a substrate mixture, ensuring proper ventilation, food, and moisture.
How to Prevent Grain Mite Infestation
Grain mites are unwelcome guests that can infest mealworm farms if not adequately controlled. From my experience, here are the most effective preventive measures.
Proper hygiene: Regularly clean the containers, removing waste, molting skins, and any debris that could attract mites.
Temperature and humidity control: Grain mites thrive in warm and humid conditions. Ensure that the farm is well-ventilated, maintaining an ideal temperature range of 75-85°F (24-29°C) with relative humidity between 40-60%.
Grain storage: Store mealworm food (grains, bran, vegetables) in airtight containers and freeze them for 48 hours to kill any potential mites before introducing them to the farm.
Natural predators: Consider introducing beneficial mite predators, such as predatory mites or rove beetles, to control and reduce grain mite populations.
Bottom Line
Maintenance is an integral part of mealworm farming. As you can see it doesn’t take much effort. And a well maintained mealworm farm is going to produce healthier worms, which means more profit.
By following these guidelines and remaining vigilant, you can ensure the health and productivity of your mealworm farm. Through these steps you will soon be on the way to profitability.